 |
Happy Halloween Scrappy Stars #2 - 45" x 55"
|
These star blocks were another recent discovery. I made them way back in 2015 when I started a quilt for DGD#2, which I posted about here and here; and I finally finished last year. For some reason, I made 40 blocks but only used 26 for DGD's quilt. Since I already had the star blocks, I thought this top would be a quick and easy finish. I started it a couple days ago and finished this morning so it was a quick finish -- but not so easy as it gave me some grief.
It wasn't until I was sewing the sashing that I realized some of the blocks were 1/4" to 1/2" too small. (Maybe that's why I put them aside.) I had to get a little creative and used a zigzag stitch to get the 1/4" seam and hopefully ensure the seams won't come apart. I think the seams will hold as I'm keeping this quilt for a wall hanging; and I know it won't get used a lot or be washed often.
After I sewed the sashing, the quilt was wavy and wonky. I realized the top and center measurements were off by about 1/2". Ugh! Now what? For a nano-second, I thought about throwing it in a dark corner of my closet. But I forged ahead hoping it could be remedied with the borders. I used the center (smaller) measurement for the inner border and had to stretch and ease it all to fit. Then I used a steam iron to stretch (block) it after adding each border. I am happy that it is now nice and flat ... and ready to be quilted.
This is my newest work-in-progress that I started today. Well, actually, the pieces were already cut and I just finished sewing the blocks. Now I just need to sew the rows and add the borders. It's all straight sewing so it'll be another quick finish. Another donation for Project Linus.
I'm always on the lookout for fast and easy patterns for my kids' charity quilts and found this quilt picture a while ago. I have no idea where I found it, and I searched the Internet for a pattern but didn't find one just like it. So I created my own.
This quilt was my inspiration because it has a Dia De Los Muertos print similar to one in my stash. I cut my print squares at 4.5" and the strips at 4.5" x 2.5" with 2.5" cornerstones. Now that I see it displayed I'm thinking the squares should be larger, maybe 5.5". For next time ...
 |
| Bobby Dazzler - 48" x 60" |
And I finished the Bobby Dazzler quilt top. This was a fun and easy top to make and I love how it came out. The designer wrote the pattern with a beginning quilter in mind and tended to be too precise (wordy) which I think made the instructions a little confusing. I think I may make a patriotic quilt from this pattern. I'll have to put it on my "to make" list.
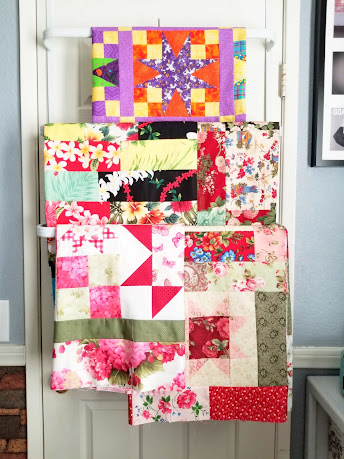
I used to keep my flimsies folded up on a shelf in my closet waiting for their turn to be quilted. Sometimes they waited for months, even years. Then, one day, as I read some quilting blogs, I saw that some of the flimsies were out on display. And why not? Why hide them? So I bought this bathroom towel holder which is perfect for storing and displaying smaller flimsies. This display is in the guest bedroom and I love how it brightens up the room.
Linking up to:
So until next time ...
Be happy and keep on quilting!


%20Stella.jpg)

You've been SEW productive. That Bobby Dazzler quilt is gorgeous!!
ReplyDeleteWow, you have been busy! It stinks when edges don't line up and measurements don't quite fit. Good for you for being creative and making it work. Much better than stuffing it back in a closet to deal with another time!
ReplyDeleteAnd I read your previous post. That's exciting you're getting a Go! I don't have one -- yet. Haha.
Wow! Three great projects!
ReplyDelete