Posts

Showing posts from February, 2010

Weekly Finish #6-#7 More Quilts for Kids

Image
Finally finished the Touch of Comfort quilt for Quilts for Kids.  I named it “Jumpin’ Frogs”, and it is now on its return trip. I didn’t salvage enough fabric from the kit for the binding so I used a black/white check fabric from my stash.  I think it goes well with the black/white striped inner border. This was such an easy and quick design that I made a second quilt (below) to send along with the Jumpin’ Frogs quilt. I plan to request a second kit soon, and I will again add a second quilt to go along. Happy quilting!

Weekly Finish #5 Tillie’s Treasures

Image
This is another Nickel Quilt using fabrics from my stash.  I’ve had some of these fabrics for YEARS and I am so trying to use them all up.  They are so outdated, but I promised myself I’d use up these old fabrics before I bought more fabric.  I can’t wait to add to my stash and buy some of the lovely new fabric lines …   I’ve made several quilts from Pat Speth’s Nickel Quilt books, but I must say this one was quite the challenge.  It was my problem child!  The technique was not difficult, but cutting and sewing all those 2.5” squares and half-square triangles was time-consuming…not to mention that I had to be careful when sewing the blocks together (yes, Mr. Seam Ripper was never too far away).  Of course, I was in a hurry to finish … too bad I made a mistake when I laid out the design and didn’t notice until after I had sewn several rows.  Oh, no!  I had to “unsew” everything then lay it out the right way; and then sew it all up again.  I was fed up!   So I put it away for a

Pinwheel Sampler Quilt Along

Image
  Here are the first two blocks of my Pinwheel Sampler, which I’m making as part of the quilt-along hosted by Rachel of p.s. i quilt .  I love pinwheels so I know this’ll be fun to make.  I’m using the following fabrics from my stash.  I love the bright color combo:  pink, green, and orange with yellow as an accent. The colors don’t show up well because I took this pic in the evening, but I can’t wait to see the finished quilt.  Here’s Rachel’s sample: The quilt-along will take 12 weeks so there’s no pressure or stress in making this.  This is the first week and the first two blocks so there’s still time to join the fun!  Rachel has a great tutorial … here’s the link to block one.  Also, be sure to check out the Flickr pool for inspiration! Happy quilting!

Weekly Finish #4 Wrapped In Hope Quilt

Image
Margaret's Hope Chest is a non-profit quilting organization that provides birthday quilts for children of prisoners across the country.  Gabriella is a 'Wrapped in Hope' child from California and her birthday is March 2! She likes pink, purple, and black and Disney Princesses so I made this quilt especially for her.  I finished this today; it just needs a label and it’s ready to go!  The border fabric is pink and has an all-over design with Princess and crowns.  I used pink and purple fabrics with lime green and black fabrics for accent.  I also used a fabric with butterflies and pink/purple colors. I was fortunate to find this Disney Princess fabric at Walmart and purchased what was left on the bolt: 1.5 yards so I had to piece it.  It shows blue in the picture above but it is actually a lavender background. I also signed up to make a quilt for Christian … another ‘Wrapped In Hope’ child from California.  His birthday is in June and he likes Spiderman, books and

WIP: Quilts For Kids … Touch of Comfort

Image
A couple days ago I posted about the kit I received from Quilts For Kids .  Since everything was already pre-cut, there was nothing to it but to sew it.  The top was so fast and easy … took only a few hours to complete.  Aren’t the whimsical frogs so cute?  And I really like how the black and white striped inner border adds a little pizzazz to the design. By the way, the backing IS included in the kit so all that’s left is the quilting and binding.  It should be finished within the next couple of days. Request your Touch of Comfort quilt kit here .

Yellow & Blue Quillow & Texas Two-Step

Image
Last week I went to my favorite fabric store, M & L Fabrics in Anaheim, CA.  I was almost ready to leave when I ran into my pal Mary.  Although we regularly email, I had not seen her in a year.  In fact, one of the last times I’d seen Mary was at M & L Fabrics, when I purchased this fabric to make her a quillow for her birthday … in 2008! For one reason or another, I never made the quillow and always felt bad because I’d promised it to her.  When I ran into her last week, I knew I had to make the quillow without further delay … and here it is! Quillows were all the rage many years ago, and I remember everyone was making quillows.  Quillows are not difficult and are fun to make, taking only a few hours to complete.  The one I made here is a basic design, but you can make a patchwork pillow sleeve with quilt blocks, or add a ruffle to the outside.   Here are some links for instructions to make your own: Quiltbug.com/Quillow Fiber Fantasies/Make A Quilt In A Pillow Ca

Quilts For Kids … Kit Arrived!

Image
Look what came in the mail today … a quilt kit from Quilts for Kids , a non-profit organization that provides comfort quilts for hospitalized children.  They recently partnered with P&G’s Downy brand, and Quilts for Kids receives 5 cents for every purchase of specially marked Downy. The program is called the Downy Touch of Comfort . The kit provides all the fabric for the top and backing, although you do need to provide the batting.   The fabric is also precut into squares and strips.  It even includes a nice woven label.  How cool is that!  And, once completed, you’ll need to provide postage to return the quilt.  The quilts will then be distributed to seriously ill children all over the country.  The March issue of The Quilter Magazine features an article explaining the importance of the Downy Touch of Comfort Program to seriously ill children all over the country.  This program has enabled Quilts for Kids to create over 10,000 quilt kits to send to quilters across t

WIP: On The Road to Spring

Image
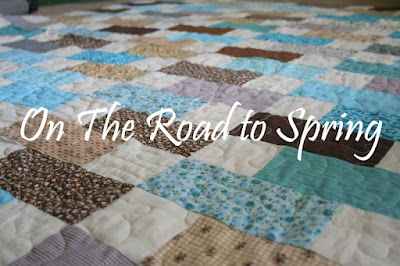
Still working on my Road to Spring quilt.  This is such an easy and fun design! The picture above is Randi’s sample quilt, and here’s the one she’s working on for the tutorial: I finally finished cutting my 100 squares and 100 rectangles, and it took me no time at all using my handy-dandy Shape Cut from June Tailor. From this:  To this:  And this ~ 120 rectangles in about 10 minutes: The Shape Cut by June Tailor is one of my all-time favorite quilting tools.  It is such a time-saver!  Step 1 :  Fold yardage in half, with the fold at the top ~ width measures about 11 inches.  You will have 4 layers to cut.  Place the Shape Cut on top and cut your strips per your desired width.  In this case, I needed 3.5” squares, so I cut at the 3.5, 7 and 10.5 slots: Step 2 :  Without moving your strips, you turn the Shape Cut to the side so that you are now cross-cutting the strips, again at the 3.5, 7, and 10.5 slots. Remove the Shape Cut, and ~ ta-da! ~ you have 36 squares in le

On The Road to Spring Quilt-Along

Image
Now that Camp Sloanie with Pat Sloan has ended, I thought I’d join Randi at i have to say .  She is hosting a fun quilt-along she is calling "On the Road to Spring".  Week one : selected fabric from my stash.  I finally settled on this fabric collection from South Sea Imports designed by Robyn Pandolph, and I matched it up with similar fabric from Maywood Studio.  I’ve had these fabrics squirreled stored away for a couple of years, and I am so happy that I finally get to use them.  Week two :  cutting the pieces (squares and rectangles).  Well, that was last week, and I got as far as cutting out the larger pieces from yardage.  But still need to get busy cutting all those 100 squares and 100 rectangles.  Gotta love that rotary cutter and mat! This is already week three and everyone is busy sewing their strips together.  I should be able to catch up this week … gotta love retirement!   ‘Til next time … happy quilting!

She Received Them!

Image
Heida from Handmade by Heidi got her potholders!  I ran across her post and saw this picture.  I was thrilled to read that she was happy with her surprise package.  I had so much fun making them that I’ve already signed up for round two!  Potholders are quick and easy to sew and make great gifts.   Happy quilting!

Camp Sloanie Quilt Top Finished!

Image
Well, okay, it’s not 100% finished as I still want to add inner and outer borders, but I made this in less than 24 hours.  Of course, it did help that I already had a stack of pre-cut 2-inch yellow strips, a big-time saver.  I used six 2-inch strips so the blocks measured 9 inches unfinished.  There are 6 blocks in each row, and there are 6 rows.  Once completed, this center panel should measure 50 square inches. I have a confession:  In my previous post , I said I had completed 36 blocks … must have been wishful thinking.  This morning when I laid out my blocks I discovered that I was 6 blocks SHORT!  Oh no!  So I quickly sewed up the additional blocks and laid out my design.  I decided to keep it simple and stick with the original pattern design.  I think I like it like that!  I took an afternoon break to meet with my pals Vivian and Lorie at the movie theatre to see “It’s Complicated”.  This movie is hilarious … we were ROFL!  I highly recommend it. Once back home, I sewed up m

Pat Sloan Winter Stashbusting Camp Sloanie

Image
What a great weekend to be at camp … Camp Sloanie , that is!  It started raining here Friday night and continued into Saturday morning … with most eastern states caught in a massive snowstorm, what else can one do but stay home and quilt? Friday was Day One of Camp Sloanie and most campers were busy cutting and sewing their blocks.  By Saturday afternoon, many were close to finishing … or had actually finished …  their quilt tops. But those who know me well know that I am always a dollar short and a day late, so I didn’t show up for camp until Saturday afternoon.  Luckily, I already had a stash of pre-cut yellow strips, and the Camp Sloanie pattern is an easy-peasy design.  I was able to sew up these 36 blocks within a few hours.  I should have the layout and rows sewn by Sunday afternoon: Be sure to head on over to Pat's blog and have a look at some very talented folks who are joining in.  There's also a Flickr group! CLICK HERE for pictures. Happy quilting!